Quick Start
NanoMQ MQTT Broker (NanoMQ) is a lightweight and blazing-fast MQTT Broker for the IoT Edge platform. This guide will use Docker deployment as an example to show you how to speedily get started with NanoMQ.
Run NanoMQ using Docker
Run the command below to speedily run NanoMQ with Docker:
docker run -d --name nanomq -p 1883:1883 -p 8083:8083 -p 8883:8883 emqx/nanomq:latestFor more information about NanoMQ official Docker image, see Docker Hub - nanomq
Experience the NanoMQ Services
Now the NanoMQ is started with Docker, exposing ports 1883, 8083, and 8883 for MQTT traffic, MQTT over WebSockets, and MQTT over SSL/TLS for secure communication respectively. This section guides you through how to use the MQTTX client tool to experience the messaging services.
Setup the MQTTX Client
Install MQTTX on your machine if you haven't done so. You can download it from the official site. After installing, open the MQTTX application.
Connect to NanoMQ
Click on New Connection on the home page. In the General panel, set as follows:
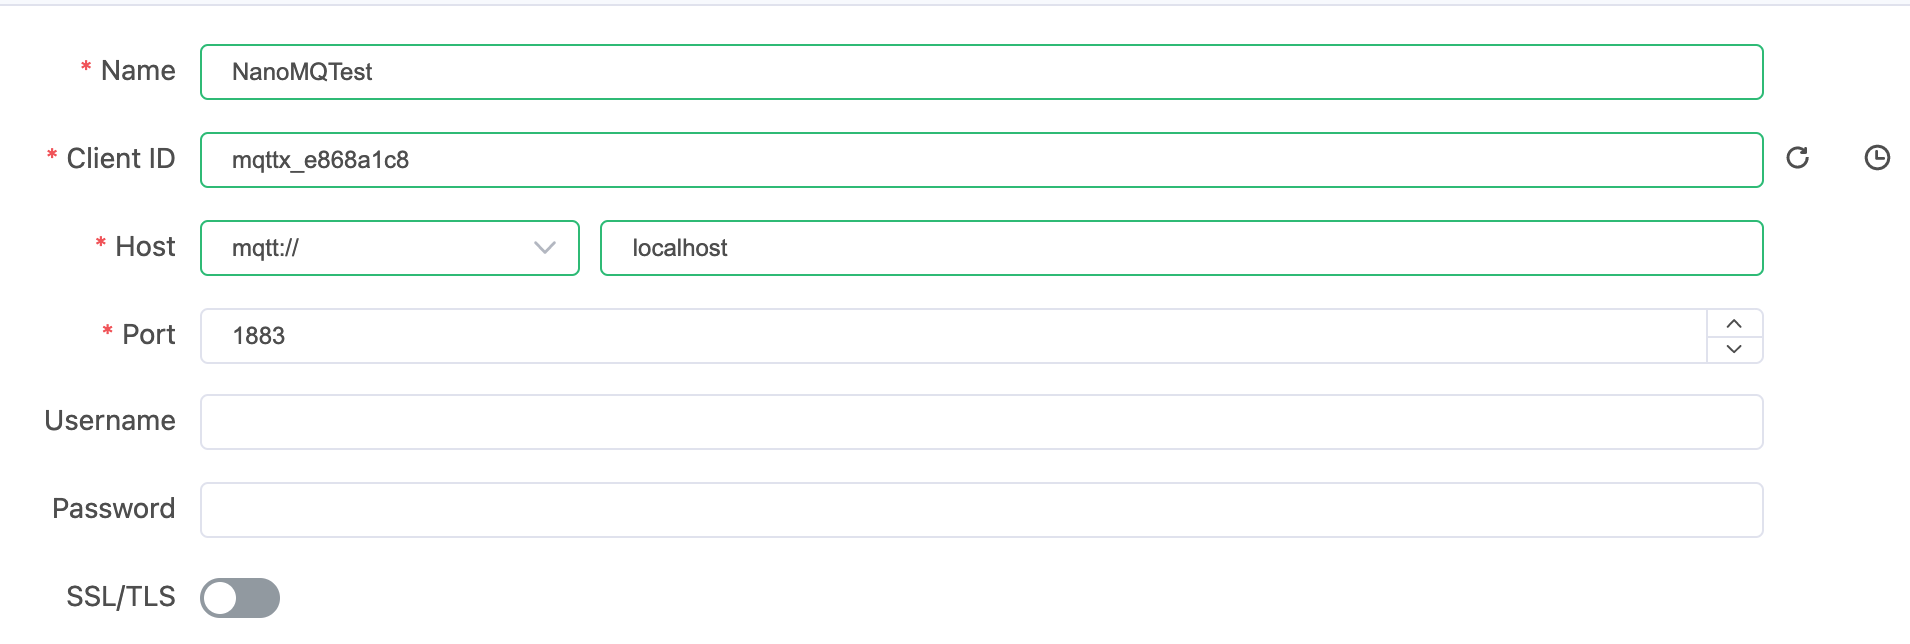
- In the Name field, give your connection a name.
- MQTTX will automatically fill in a Client ID.
- Choose MQTT as the protocol and fill in
localhost(or the IP where your Docker is running). - Set Port with
1883(or any other exposed port depending on your needs).
Then click Connect in the top-right corner. A prompt will pop up indicating the connection is successfully set up.
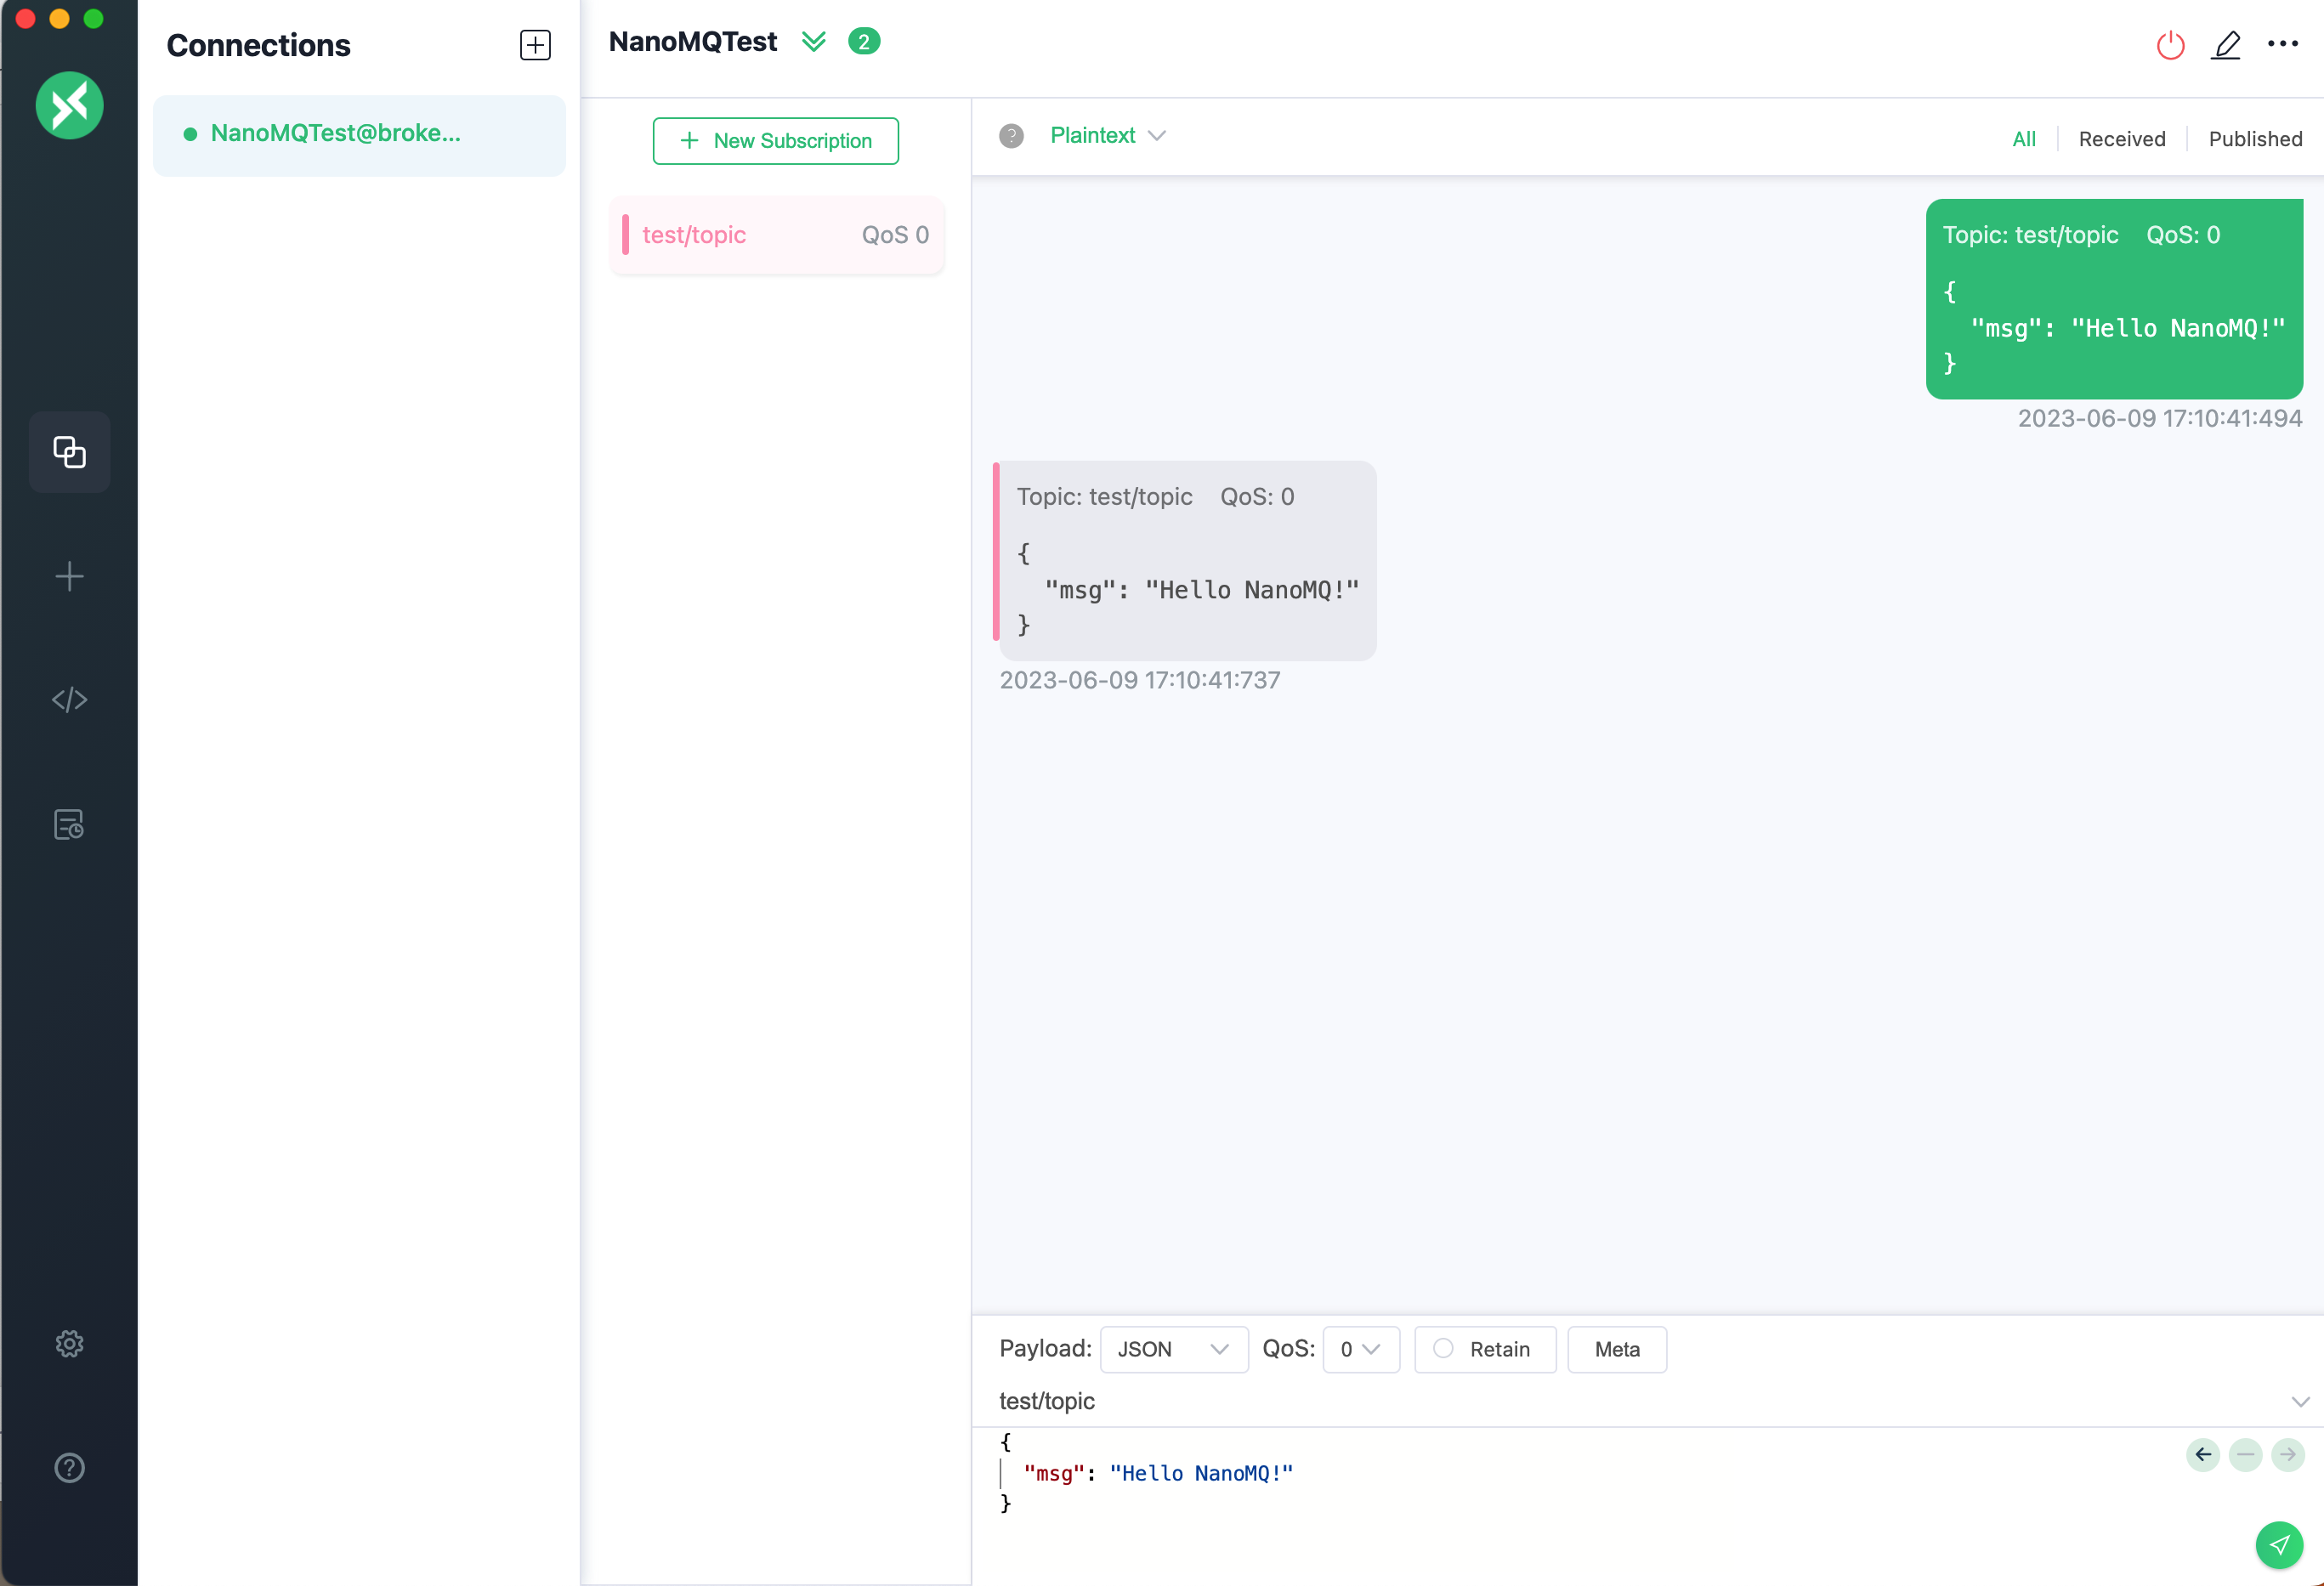
Subscribe to a Topic
On the Connections page, Click on the + New Subscription button, then act as follows:
- Enter the topic you want to subscribe to, in this case,
test/topic. For the rest, you can keep the default setting. - Click on Confirm.
Publish a Message
On the Connections page, act as follows:
- Specify the topic to which you want to publish. For instance, use
test/topic. - Enter the message payload you want to send, for instance, "Hello NanoMQ".
- Click on publish icon.
A message will appear in the dialog box area, indicating the message is successfully published to the NanoMQ broker and forwarded to the subscribed topic.
In the following sections, this tutorial will guide you through how to create an MQTT over TCP with the free public MQTT bridge broker.emqx.io.
Configure an MQTT over TCP Data Bridge
Pull the NanoMQ Docker Image
Pull the latest NanoMQ image from Docker Hub:
docker pull emqx/nanomq:latestCreate a NanoMQ Configuration File
Create a new configuration file on your local machine. This will hold the settings for the NanoMQ broker, including the bridge configuration.
You can use a text editor to create a new file named nanomq.conf, and then copy the following bridge configuration into the file:
bridges.mqtt.emqx1 {
	# # Bridge address: host:port .
	# #
	# # Value: String
	# # Example: mqtt-tcp://127.0.0.1:1883
	# #          tls+mqtt-tcp://127.0.0.1:8883
	# #          mqtt-quic://54.75.171.11:14567
	server = "mqtt-tcp://broker.emqx.io:1883"
	# # Protocol version of the bridge.
	# #
	# # Value: Enum
	# # - 5: mqttv5
	# # - 4: mqttv311
	# # - 3: mqttv31
	proto_ver = 4
	# # The ClientId of a remote bridge.
	# # Default random string.
	# #
	# # Value: String
	# clientid="bridge_client"
	# # Ping: interval of a downward bridge.
	# #
	# # Value: Duration
	# # Default: 10 seconds
	keepalive = 60s
	# # The Clean start flag of a remote bridge.
	# #
	# # Value: boolean
	# # Default: false
	# #
	# # NOTE: Some IoT platforms require clean_start
	# #       must be set to 'true'
	clean_start = false
	# # The username for a remote bridge.
	# #
	# # Value: String
	username = username
	# # The password for a remote bridge.
	# #
	# # Value: String
	password = passwd
	# # Topics that need to be forward to IoTHUB
	# #
	# # Value: String
	# # Example: topic1/#,topic2/#
	forwards = [
		{
			remote_topic = "fwd/topic1"
			local_topic = "topic1"
			qos = 1
		},
		{
			remote_topic = "fwd/topic2"
			local_topic = "topic2"
			qos = 2
		}
	]

	subscription = [
		{
			# # Need to subscribe to remote broker topics
			# #
			# # Value: String
			remote_topic = "cmd/topic1"
			local_topic = "topic3"
			# # Need to subscribe to remote topics QoS.
			# # Please set QoS for each subscription topic
			# # otherwise topic is invalid, NanoMQ won't sub to any topic
			# # Value: Number
			qos = 1
		},
		{
			remote_topic = "cmd/topic2"
			local_topic = "topic4"
			qos = 2
		}
	]
	# # max_parallel_processes
	# # Handle a specified maximum number of outstanding requests
	# #
	# # Value: 1-infinity
	max_parallel_processes = 2
	# # max send queue length
	# # Handle a specified maximum number of message send queue length
	# #
	# # Value: 1-infinity
	max_send_queue_len = 32
	# # max receive queue length
	# # Handle a specified maximum number of message receive queue length
	# #
	# # Value: 1-infinity
	max_recv_queue_len = 128
}
Start NanoMQ with the Configuration File
Now you can start the Docker container, and use the -v flag to mount your local configuration file into the Docker container:
docker run -d -p 1883:1883 \
           -v /path/to/your/nanomq.conf:/etc/nanomq.conf \
           --name nanomq emqx/nanomq:latest
Replace /path/to/your/nanomq.conf with the actual path to your nanomq.conf file on your local machine.
Online/Offline event message
Thanks to the embedded Actor model and asynchronous I/O, NanoMQ natively support event-driven messaging mode. Users could get online and offline event messages of clients by subscribing to system topic.
The status of bridging channel will also trigger a event message on SYS topic, with a unique client identifier set in the configuration file.
Online message:
Topic: $SYS/brokers/connected
Message: {"username":"hello", "ts":1691225605933,"proto_name":"MQTT","keepalive":60,"return_code":"0","proto_ver":4,"client_id":"nanomq-8a2a5c2e","clean_start":1, "IPv4":"127.0.0.1"}
offline message:
Topic: $SYS/brokers/disconnected
Message: {"username":"hello","ts":1691225608391,"reason_code":"8b","client_id":"nanomq-8a2a5c2e","IPv4":"127.0.0.1"}
Start from 0.24.1 ver, Online/Offline event message is redirected to one merged topic
Online message:
Topic: $SYS/brokers/client_status/${clientid}
Message: {"status":"online", "username":"hello", "ts":1691225605933,"proto_name":"MQTT","keepalive":60,"return_code":"0","proto_ver":4,"client_id":"nanomq-8a2a5c2e","clean_start":1, "IPv4":"127.0.0.1"}
Offline message:
Topic: $SYS/brokers/client_status/${clientid}
Message: {"status":"offline", "username":"hello","ts":1691225608391,"reason_code":"8b","client_id":"nanomq-8a2a5c2e","IPv4":"127.0.0.1"}
And the retain flag is added to bridging connect/disconnect event message, so that you can get the updated bridging connection status by subscription.
Test bridging
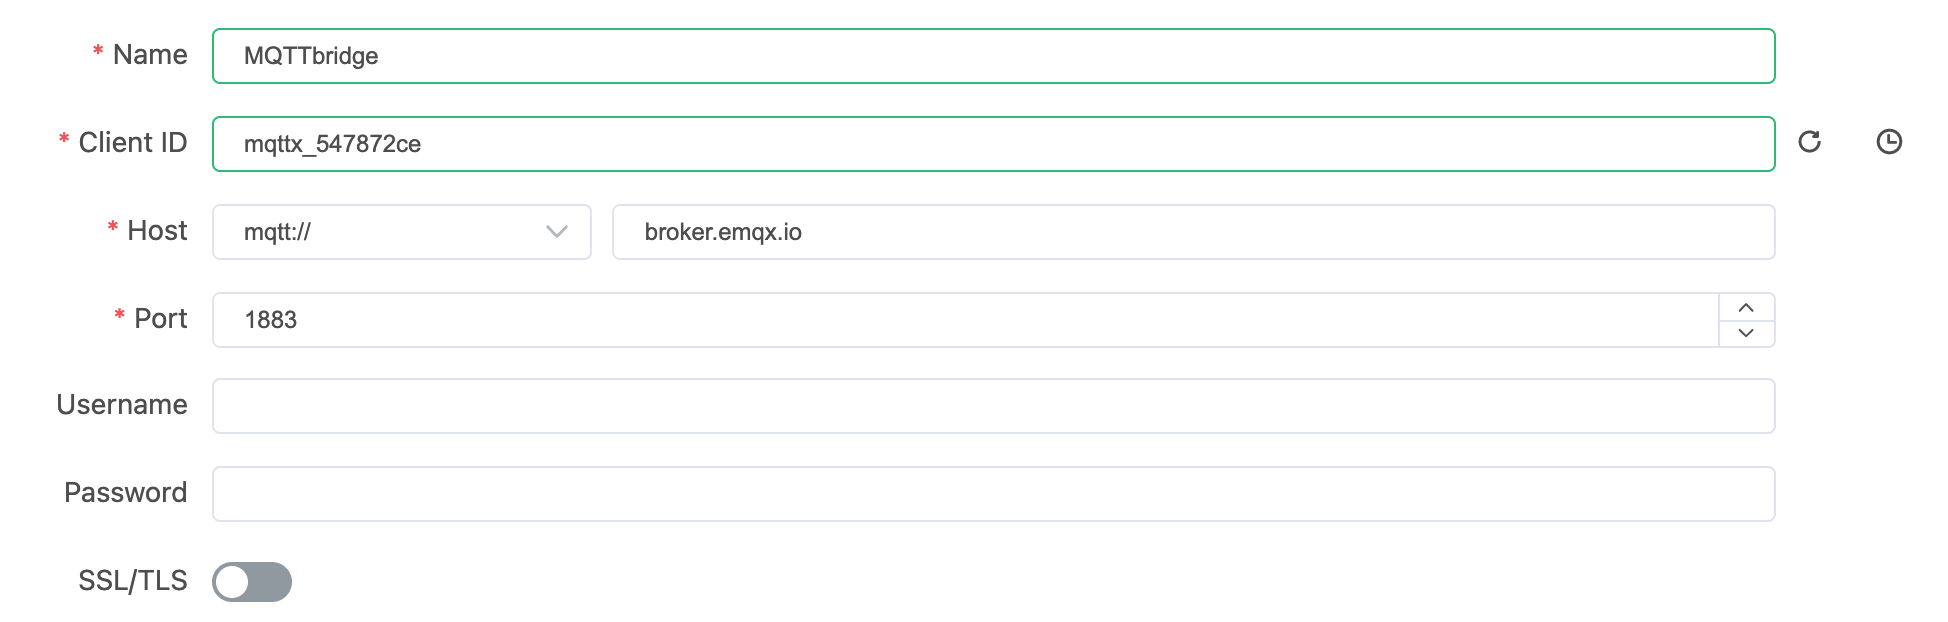
This section will continue using the MQTTX client tool to test the MQTT data bridge you created.You will create 2 clients for connecting NanoMQ and the MQTT bridge and verify the messaging services between NanoMQ and the MQTT bridge.
Client connecting NanoMQ
Client connecting MQTT bridge
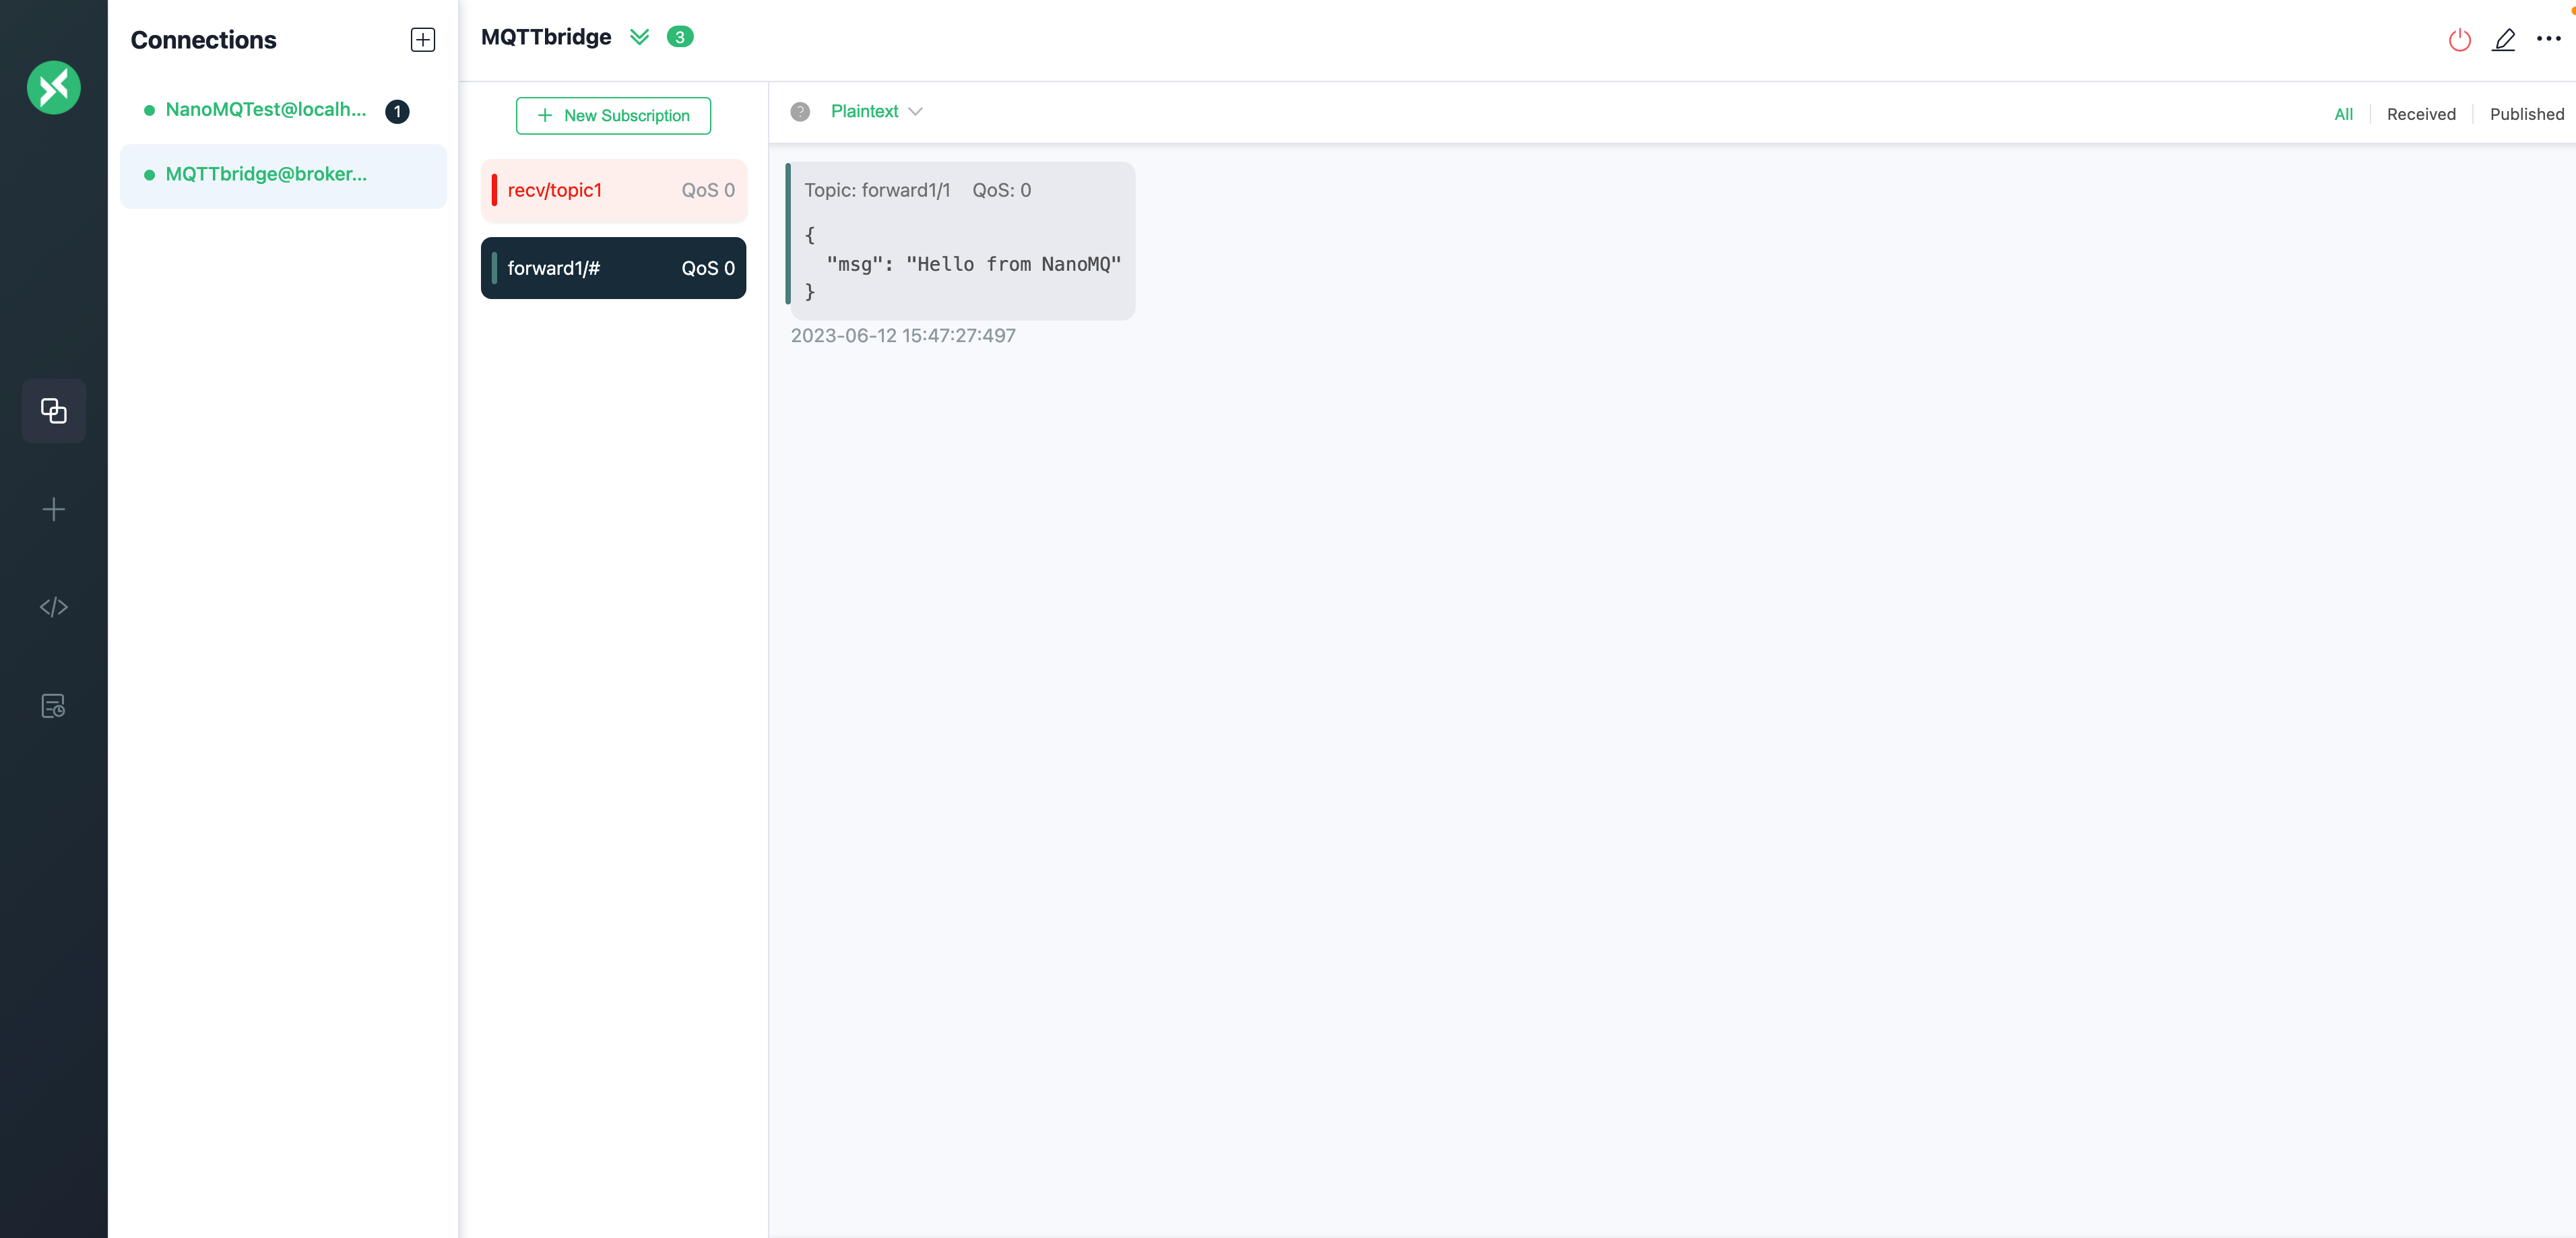
Verify messging from NanoMQ to MQTT bridge
On your client connecting the MQTT bridge, MQTTbridge in this example, subscribe to the forward1/# topic.
On your client connecting NanoMQ, NanoMQTest in this example, publish a message to the forward1/msg topic, for example, Hello from NanoMQ
Verify that you received the message that was published from the local broker.
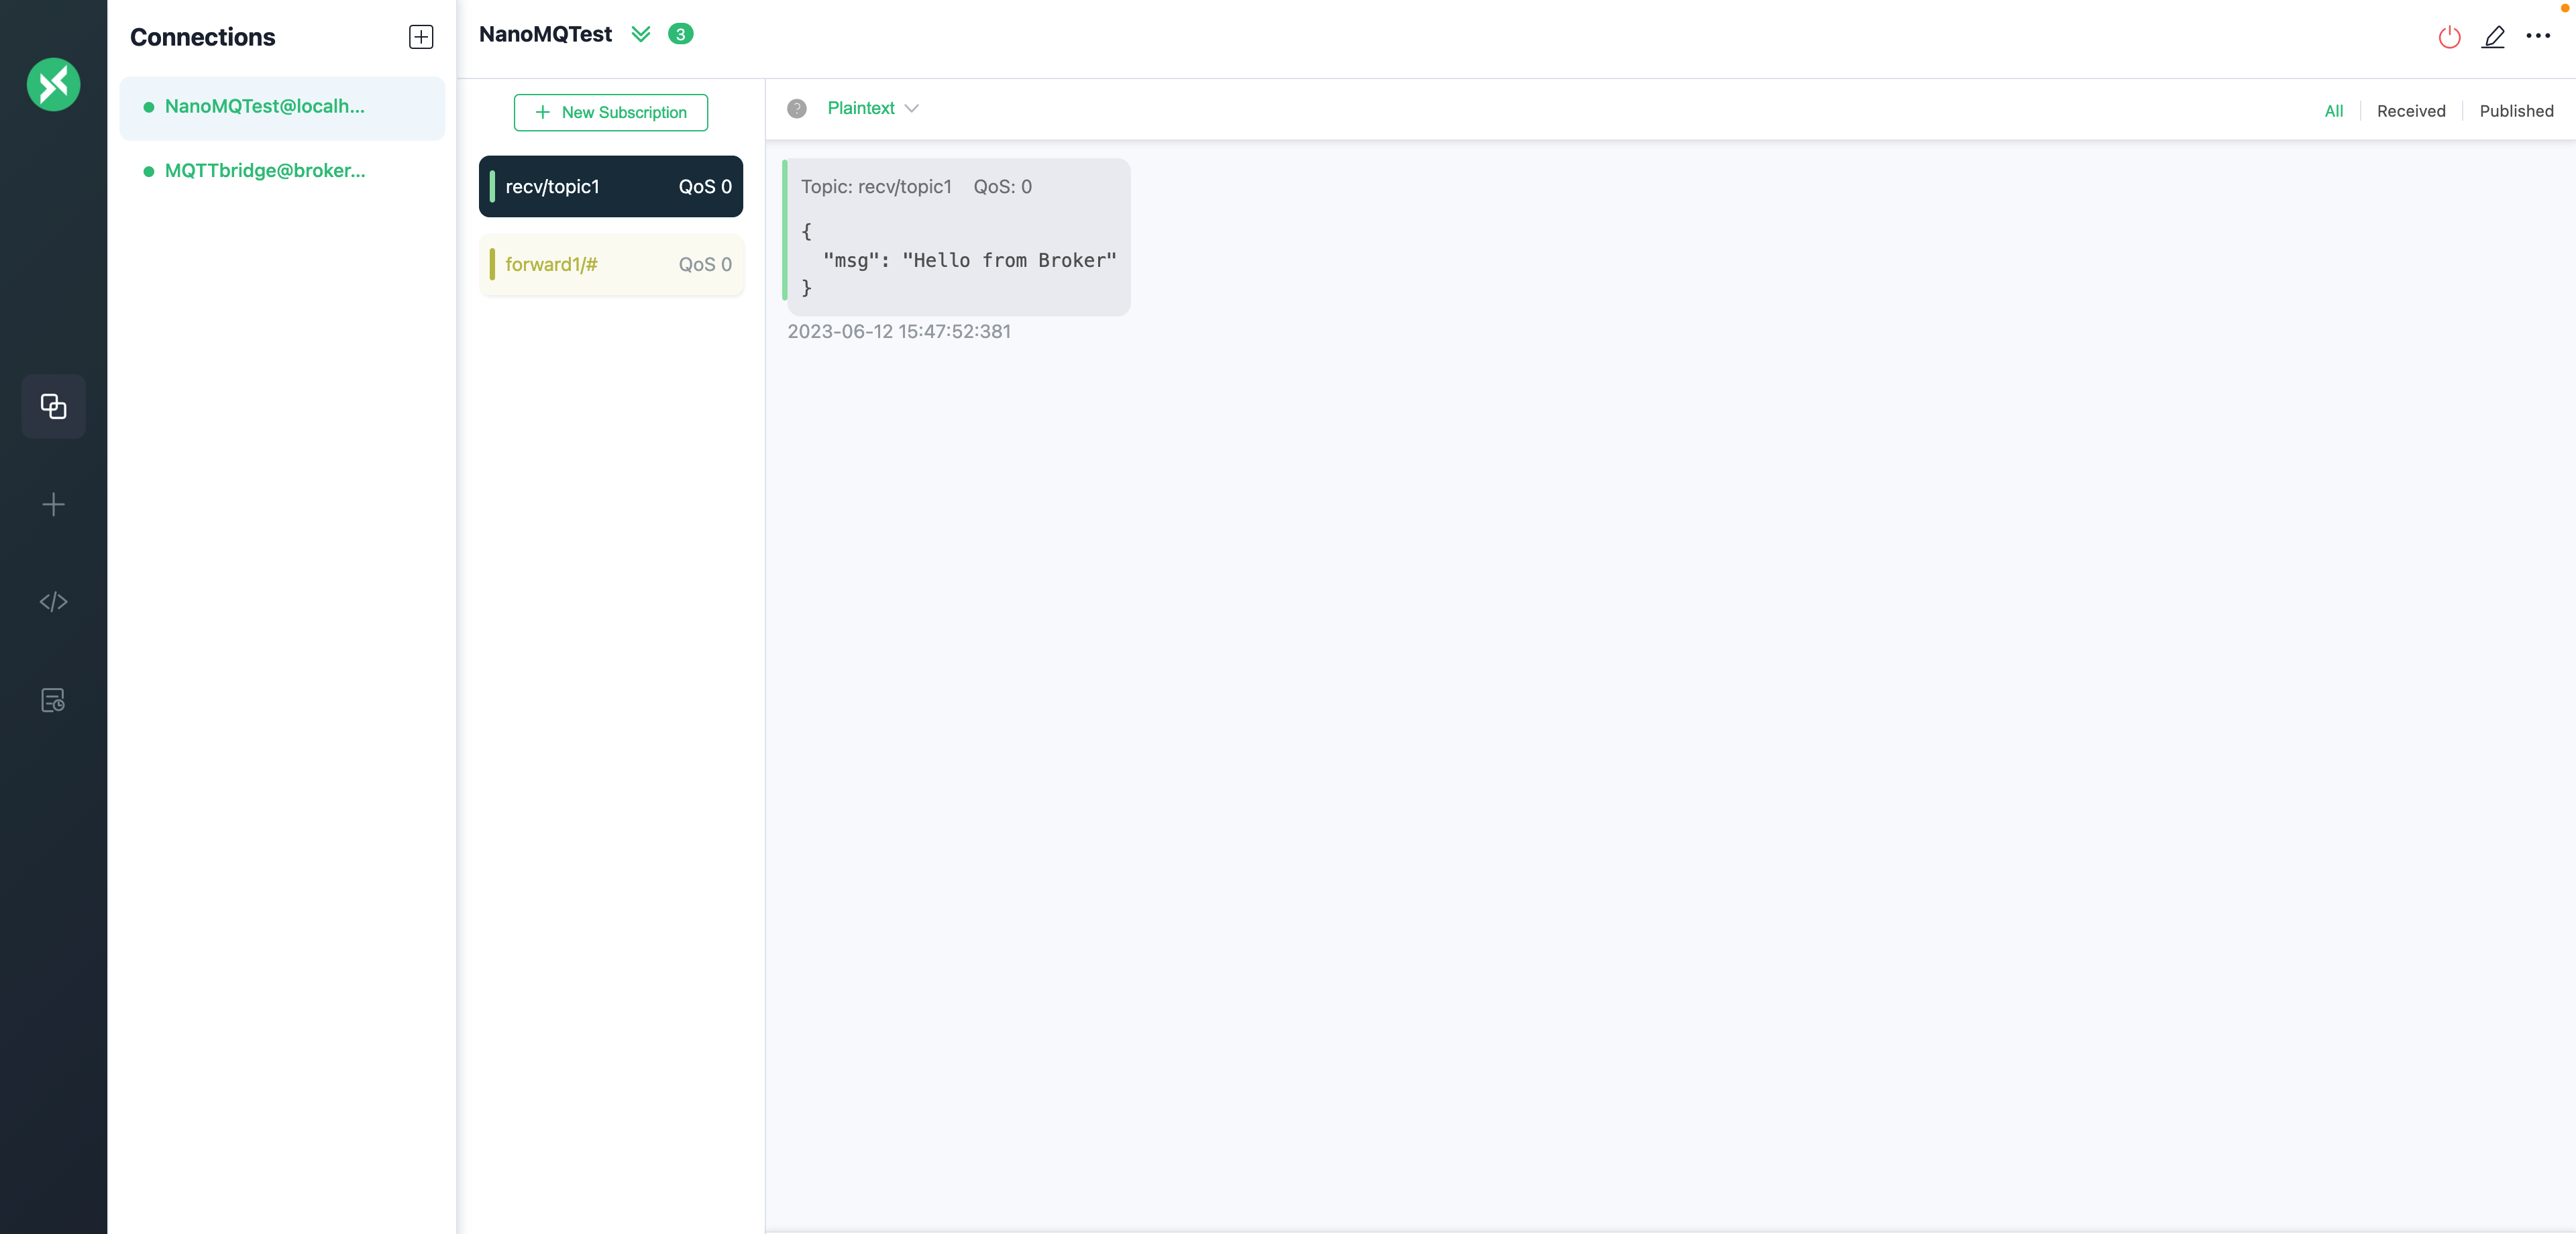
Verify messaging from MQTT to NanoMQ
On your client connecting NanoMQ, NanoMQTest in this example, subscribe to the recv/topic1 topic.
On your client connecting the MQTT bridge, MQTTbridge in this example, publish a message to the recv/topic1 topic, for example, Hello from broker.emqx.io
Verify that you received the message that was published from broker.emqx.io.